Tolerance and Specifications
Set Tolerances
Tolerance is the specified amount of variation allowed in the dimensions of a part.
It is important to set accurate, specific tolerance ranges appropriate for your part and its features.
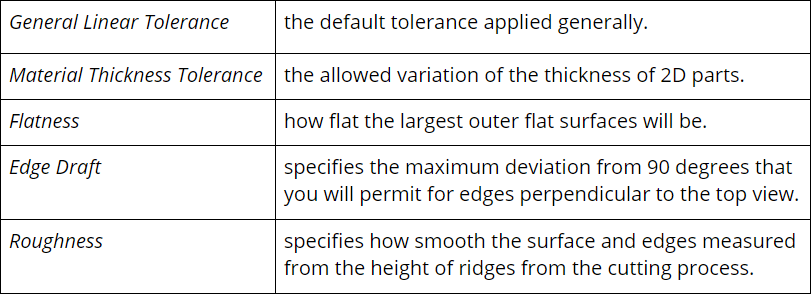
- Choose menu Job > Settings > Specifications: Auto to set:
- If bend lines are used, choose menu Job > Settings > Specifications: Bend to set bend specifications.
- Note: Dimensions between part features post-bending can vary substantially due to the accumulation of tolerances, especially on complex bends. Use Comments To Machinist to specify tolerances between features post-bend.
- To set the local tolerance of a feature on your part, draw a line across the feature and choose Line > Machine > Tolerance.

Tolerance Rules
For the following, General Linear Tolerance is denoted as “T”
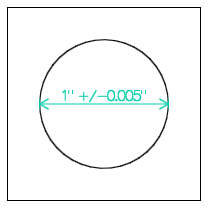
- The size of features such as circles, slots, and outer shapes can vary by +/- T.
- As measured from any specified datums, the center of circles can be in a circular region of radius that is (*1.4ㆍT).
- As measured from datums, the position of single, straight edges can vary by +/- T.
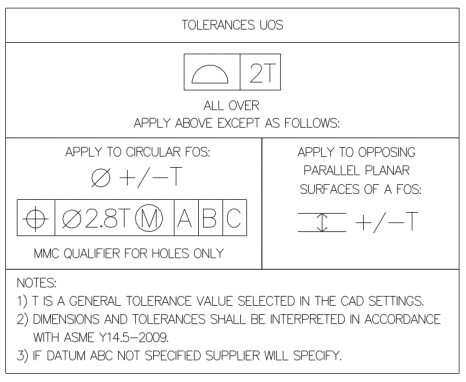
*The values 1.4 (√2) and 2.8 (2ㆍ(√2)) are derived from the GD&T equivalent of older style square zone tolerancing where +/- T is applied separately to each axis.

GD&T Tolerances
GD&T is a method of specifying the geometry of physical objects on CAD drawings, including tolerances, size, and orientation.
Specify advanced GD&T tolerances using Comments To Machinist
The following on the right is used as the basis for determining whether or not your part conforms to your specifications:
The order of precedence of tolerances from highest to lowest is as follows:
- Tolerances explicitly described using Comments To Machinist.
- Local tolerances set in menu Line > Machine > Tolerance.
- For 2D Parts cut from sheets, the tolerance set in menu Job > Settings > Specifications: Auto > Material Thickness Tolerance.
- General Linear Tolerance set in menu Job > Settings > Specifications: Auto > General Linear Tolerance.
For parts made by extrusion, the general tolerance applies to the cross-section.
Measurements are done at 20C +/- 1 or 68F +/- 2.

Default Tolerance Limits
eMachineShop uses default tolerances unless specified otherwise.
Standard specifications and tolerances applied unless otherwise specified.
Other Processes
For injection molding, rapid prototyping, and other processes, please see the respective pages.
Mating Parts
If you are designing two parts to fit together with a certain tolerance, make sure the lowest possible dimension of the female part is greater than the largest possible dimension of the male part. Keep in mind the opposing limits, and if the fit is too loose, tighten the tolerance.
Completeness
Specify every important detail about your part. Depending on your needs you might need to specify:
- Local dimensional position tolerances.
- Local dimensional size tolerances.
- Dimensional tolerances of parts post-bending.
- Color, texture, surface appearance.
- Other GD&T factors.
- Etc.